

My daughter~in~law is helping her niece with her wedding and wanted some western style yet vintage pennants.
She asked if I could help and I thought I would share how easy it is to do!
Now you could use fabric of your choice and make some really fun pennants. She wanted burlap and a vintage style fabrics.

Step 1
Gather supplies...heat n' bond or wonder under, fabric, burlap, sharpie, template, scissors, big eye needle, jute, sewing machine, ruler.

Step 2
Cut heat n' bond slightly smaller than fabric. Lay fabric wrong side up on ironing table.

Step 3
Iron heat n' bond onto fabric with paper side up using NO steam.

Step 4
Trace letters onto fabric backwards. Once cut it will be right.
If you have an accuquilt cutter alphabet then cut your letters out.

Happily Ever After, Here Comes The Bride, Cards...just some of the ones I cut.
Step 5
Drink a large iced tea and admire your letters!

Step 6
Double the burlap and draw around the pennant template with a sharpie. You want your pennant to
be stable so you will be doing them with a double thickness.

Step 7
Sew around two pennants laid on top of each other using a scant 1/4 inch.

Step 8
Carefully cut off edge up to sewing line.

Step 9
Peel off paper backing from letters.

Step 10
Measure down from top of pennant how far you want letters to be.

Step 11
Iron on letters.

Step 12
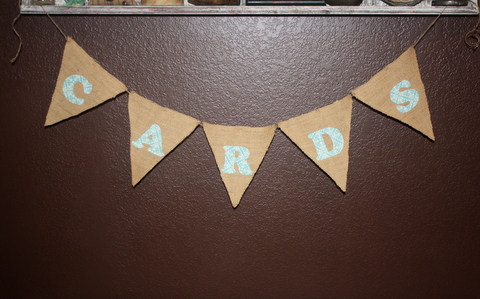
Lay out pennants with ironed on letters in order.

Step 13
Thread needle with jute leaving a long tail for hanging later. Start with the last letter in the pennants...mine says CARDS so I started with S.
In right hand top corner insert jute go across to center and come up with jute to front then about 3 holes later go back through to back. Come back up to front side at left corner.

Here is the back of the pennant.

Step 14
Thread each pennant letter leaving enough of a tail on both ends for tying later.
You can embellish with buttons, lace, ribbons use different fabrics, pictures. They could be square, rectangle, oval, or a circle....actually the possibilities are endless.
Hope you enjoyed the pennant tutorial and whip up one for a fun little project!
Until We Meet Again....Ginger
No comments:
Post a Comment